In need of a little pick-me-up for your well-loved changing pad? Look no further! This article has all the tips and tricks you need to breathe new life into that trusty changing pad you bought pre-loved. From simple cleaning methods to cost-effective DIY hacks, we’ve got you covered. Say goodbye to stains and wear, and say hello to a refreshed and revitalized changing pad that’s ready for another round of diaper changes!
Review contents
Cleaning and Disinfecting the Changing Pad
Removing the Cover
When it comes to cleaning and revitalizing an old changing pad, the first step is to remove the cover. Most changing pads come with a removable cover that can be easily taken off for washing. Look for any snaps, zippers, or Velcro attachments that hold the cover in place and gently undo them. Carefully lift the cover from the pad, being mindful not to damage any delicate materials or foam padding.
Washing the Cover
Once the cover is removed, it’s time to give it a thorough cleaning. Check the care instructions on the label to ensure you’re following the correct washing method. In most cases, you’ll be able to machine wash the cover on a gentle cycle using mild detergent. If there are any visible stains, pre-treat them with a stain remover before washing. After the washing cycle is complete, air dry the cover to prevent any shrinkage or damage.
Disinfecting the Pad
While washing the cover addresses the cleanliness aspect, it’s equally important to disinfect the changing pad itself. Start by preparing a solution of warm water and mild baby-safe disinfectant. Using a clean cloth or sponge, thoroughly wipe down the entire surface of the pad, paying extra attention to areas that come into direct contact with your baby’s skin. Allow the disinfectant to sit for a few minutes before rinsing off with clean water. Finally, let the pad air dry completely to ensure any remaining moisture is evaporated.
Removing Stains and Odors
Treating Stains
It’s not uncommon for changing pads to develop stubborn stains over time. However, there are several effective methods to treat and remove these unsightly marks. For fabric covers, consider using a stain remover specifically designed for baby items. Apply the stain remover according to the product instructions, gently scrubbing the stained area with a soft brush or cloth. For tougher stains, you might need to repeat the process or try alternative stain removal methods such as using a mixture of baking soda and water or a paste of lemon juice and salt. Always remember to spot test any cleaning solution on a small, inconspicuous area of the cover before applying it to the stain.
Dealing with Odors
Keeping the changing pad smelling fresh is essential for a pleasant diaper changing experience. To tackle odors, start by giving the cover a thorough washing (as mentioned in the previous section). If the odors persist, you can try using natural deodorizers such as baking soda or charcoal sachets. Simply sprinkle a generous amount of baking soda onto the pad’s surface, let it sit for a few hours, and then vacuum it off. Alternatively, place a few charcoal sachets on the pad and let them absorb any lingering odors. Remember to replace the charcoal sachets regularly to maintain their effectiveness.
Repairing Damaged Parts
Assessing the Damage
After prolonged use, changing pads may experience wear and tear or sustain damage in certain areas. Before attempting any repairs, it’s crucial to thoroughly assess the extent of the damage. Check for any tears, rips, or loose parts such as straps or buckles. If the damage appears minor and can be easily fixed, proceed with the appropriate repair method. However, if the damage is extensive or compromises the safety of the pad, it’s best to consider replacing the entire pad to ensure your baby’s well-being.
Fixing Tears or Rips
For small tears or rips in the cover, you may be able to mend them using a simple sewing technique. Start by cleaning the damaged area and ensuring it is completely dry. Using a sturdy thread, stitch the torn edges together, reinforcing with additional stitches if necessary. Be sure to use a thread color that matches the cover to maintain a seamless look. Trim any loose threads and inspect the repair to ensure it is secure. If the tear is too large or the cover is beyond repair, it may be time to invest in a new cover or changing pad.
Replacing Worn-out Straps or Buckles
If the straps or buckles on your changing pad have become worn out or damaged, it’s important to address this issue promptly. Start by removing the old straps or buckles, carefully detaching them from the pad. Take note of the exact measurements of the old straps to ensure you purchase replacements that are of the same length and width. Visit your local baby store or search online for replacement straps or buckles that are compatible with your changing pad model. Once you have the new parts, follow the manufacturer’s instructions for attaching them securely to the pad. This will ensure that your changing pad continues to provide the necessary safety features for your baby.
Enhancing Comfort and Safety
Adding Extra Padding
To make your changing pad more comfortable for your little one, consider adding some extra padding. This is especially useful if your changing pad has become thin or worn out over time. There are various ways to achieve this, depending on your preferences and the condition of the pad. One option is to purchase a separate foam insert or changing pad topper that provides additional cushioning. Alternatively, you can use soft blankets or towels to create a makeshift padding layer. Simply fold the blankets or towels to the desired thickness and place them on top of the pad before covering with the clean, fitted cover. Remember to choose materials that are safe for your baby and always monitor them during diaper changes to prevent any discomfort or suffocation risks.
Using a Waterproof Liner
Accidents and spills are bound to happen during diaper changes, which is why using a waterproof liner can be a game-changer. A waterproof liner acts as an additional barrier between your baby and the changing pad, helping to protect the pad from any messes that may occur. Look for a liner that is specifically designed for changing pads and choose one that is easy to clean and machine washable. The liner should be placed on top of the pad and underneath the fitted cover, ensuring it covers the entire surface area. By using a waterproof liner, you can not only enhance the comfort of the changing pad but also prolong its lifespan by preventing stains and moisture from seeping through.
Ensuring Proper Safety Standards
When revitalizing an old changing pad, it’s crucial to ensure that it still meets the necessary safety standards. Check for any recalls on your particular model or brand of changing pad to ensure that it has not been deemed unsafe. Look for labels or certifications that indicate compliance with safety regulations, such as ASTM International standards, and confirm that the pad has not expired, as some safety features may have a limited lifespan. Additionally, make sure the pad is placed on a sturdy and stable surface to prevent it from tipping or sliding during diaper changes. Regularly inspect the pad for any loose parts, sharp edges, or other potential hazards, and address them promptly to maintain a safe and secure changing environment for your baby.
Applying a Fresh Design
Choosing a New Cover
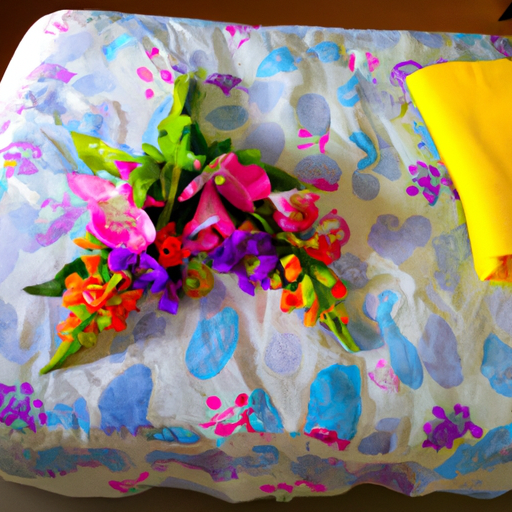
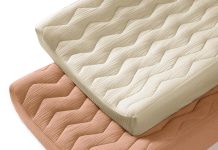
One of the easiest ways to revitalize your old changing pad is by selecting a new cover that suits your style and preferences. With countless design options available, you can choose a cover that matches your nursery decor or reflects your personal taste. Consider fabrics that are easy to clean and maintain, such as cotton or polyester blends. Opt for colors or patterns that are soothing for your baby and coordinate with the overall aesthetic of the room. Keep in mind that lighter colors may show stains more easily, so consider patterns or darker shades if that is a concern. By choosing a new cover, you can instantly transform the look of your changing pad and make it a visually appealing addition to your nursery.
Personalizing the Pad with Fabric
If you’re feeling particularly crafty and want to add a unique touch to your changing pad, consider personalizing it with fabric. This can be done in various ways, depending on your creativity and skill level. One option is to choose a fabric that complements your nursery decor and sew a custom slipcover that fits snugly over the existing pad. Alternatively, you can use fabric adhesive or Velcro strips to attach a fabric overlay to the pad. This allows you to switch out the fabric whenever you feel like giving your changing pad a new look. Get creative with patterns, prints, or even monogramming to make the changing pad truly your own.
Storage and Maintenance
Storing Properly
Proper storage is essential to maintain the quality and longevity of your changing pad, especially if you’re not using it continuously. Before stowing away the pad, ensure that it is clean and completely dry to prevent the growth of mold or mildew. Store the pad in a clean and dry environment, such as a closet or storage bin, away from direct sunlight or extreme temperatures. Consider using a breathable storage bag or cover to protect the pad from dust or potential damage. If storing the changing pad for an extended period, periodically check on it to ensure there are no signs of deterioration or pest infestation.
Regular Maintenance
To keep your changing pad in optimal condition, regular maintenance is key. Wipe down the pad with a soft, damp cloth after each diaper change to remove any residual messes. If any spills or accidents occur, clean them as soon as possible to prevent stains or odors from setting in. Check the cover regularly for signs of wear, tear, or fading and replace it if necessary. Follow the manufacturer’s recommended cleaning instructions for both the pad and the cover, and avoid using harsh chemicals or abrasives that may damage the materials. By incorporating regular maintenance into your routine, you can prolong the lifespan of your changing pad and ensure a clean and safe environment for your baby.
Keeping the Pad Odor-Free
Even with regular cleaning, odors can sometimes linger on the changing pad. To combat this, there are a few simple tricks you can try. Start by regularly airing out the changing pad by leaving it in a well-ventilated area, such as near an open window or outside on a sunny day. This allows fresh air to circulate and helps eliminate any trapped odors. You can also sprinkle baking soda on the pad’s surface and let it sit for a few hours before vacuuming it off. Baking soda has natural deodorizing properties and can help neutralize any unpleasant smells. Lastly, consider using scented lavender sachets or fabric sprays specifically designed for baby items to add a pleasant aroma to the changing pad.
Safety Considerations
Checking for Recalls
When revitalizing an old changing pad, it is crucial to prioritize the safety of your baby. Begin by checking if there have been any recalls issued for your particular make and model of changing pad. Safety recalls are typically announced by the manufacturer or relevant regulatory authorities due to potential safety hazards. Visit the manufacturer’s website or the Consumer Product Safety Commission (CPSC) website for up-to-date recall information. If there is a recall on your changing pad, follow the instructions provided by the manufacturer to rectify the issue or consider replacing the pad altogether.
Ensuring Stability
Stability is paramount when it comes to a changing pad, as it ensures your baby’s safety during diaper changes. Before using the pad, double-check that it is securely attached or placed on a stable surface. If your changing pad has straps or attachment mechanisms, ensure they are fastened tightly and can support the weight of your baby. Consider using non-slip mats or grip pads underneath the changing pad to prevent any sliding or movement during use. Regularly inspect the pad and its attachments to ensure they remain secure and free from any defects or damages that could compromise stability.
Avoiding Harmful Chemicals
When revitalizing and maintaining a changing pad, it’s important to be mindful of the cleaning products and materials you use. Avoid using harsh chemicals, such as bleach or ammonia-based cleaners, as these can be harmful to your baby’s delicate skin and respiratory system. Instead, opt for mild, baby-safe cleaning solutions or natural alternatives, such as vinegar diluted with water. When choosing new covers or fabrics to personalize the pad, opt for materials that are free from harmful substances and have been tested for safety. Look for labels or certifications that indicate the products are made without potentially harmful chemicals, such as heavy metals or flame retardants.
Alternative Uses for an Old Changing Pad
Converting into a Playmat
If you find yourself with an old changing pad that is no longer needed for diaper changes, consider repurposing it into a playmat. The soft cushioning and waterproof surface make it an ideal spot for your baby to play or do tummy time. Simply place the changing pad on the floor in a designated play area, ensuring it is clean and free from any potential hazards. You can enhance the playmat by adding toys, soft blankets, or sensory elements to stimulate your baby’s senses and encourage exploration. Repurposing the changing pad as a playmat not only extends its useful life but also provides a safe and comfortable space for your little one’s playtime activities.
Creating a Comfortable Pet Bed
Old changing pads can also find a new purpose as a cozy bed for your furry friends. Whether you have a cat or a small dog, the cushioned surface of the changing pad provides a comfortable spot for them to relax and nap. Clean the changing pad thoroughly, removing any lingering odors or stains. Place the pad in a quiet area where your pet likes to rest, such as near a window or in their own designated sleeping space. You can add a pet-friendly blanket or cover to the changing pad for extra comfort and warmth. This repurposing idea not only saves money but also ensures that your changing pad continues to be useful even beyond your baby’s diaper days.
Donating or Selling the Pad
If you no longer have a use for your old changing pad, consider donating or selling it to someone who might benefit from it. There are various organizations and charities that accept gently used baby items, including changing pads. Look for local shelters, pregnancy centers, or community organizations that support families in need. Alternatively, you may choose to sell the changing pad through online marketplaces or local parenting groups. Be transparent about the pad’s condition and provide accurate information to potential buyers. By passing on your old changing pad, you can help another family in need or potentially recoup some of your investment.
When to Replace a Changing Pad
Signs of Wear and Tear
While revitalization efforts can prolong the lifespan of a changing pad, there may come a time when it is best to replace it altogether. It’s important to regularly assess the condition of the changing pad and look out for signs of wear and tear. These signs may include significant discoloration, mold or mildew growth, foam padding that has become uneven or saggy, or straps and buckles that no longer function properly. If you notice any of these signs or feel that the changing pad is no longer safe or comfortable for your baby, it’s best to invest in a new one that meets the necessary safety standards and provides a clean and secure changing environment.
Expiration Dates of Safety Features
It’s also important to be aware that some changing pads may have expiration dates on certain safety features. Check the manufacturer’s instructions, packaging, or website for information regarding the expiration of specific safety components, such as straps or buckles. Regularly inspect these parts to ensure they are in good working condition and have not exceeded their recommended lifespan. If the safety features have expired or show signs of deterioration, it’s best to replace the changing pad to ensure your baby’s safety during diaper changes.
Final Thoughts
Revitalizing an old changing pad can breathe new life into this essential baby item and prolong its usefulness for years to come. By following the steps outlined in this article, you can effectively clean, disinfect, repair, and customize the changing pad to suit your needs and preferences. Additionally, prioritizing safety considerations, regular maintenance, and proper storage will ensure that your changing pad remains a reliable and comfortable space for your baby’s diaper changes. Whether you choose to repurpose the changing pad for alternative uses or pass it on to someone in need, you can feel proud of your efforts to revitalize an old item and reduce waste. Share your revitalization journey with other parents to inspire them to do the same and create a more sustainable and resourceful parenting community. Happy changing!
